This weekend I was in the mood for a simple craft…
I needed some wall decor…
My walls are so bare…
The next upcoming holiday is Easter, so a Bunny craft it was.

(THIS POST MAY CONTAIN AFFILIATE LINKS. WHICH MEANS IF YOU CLICK ON A LINK AND MAKE A QUALIFYING PURCHASE, I MAY MAKE SOME COMPENSATION AT NO CHARGE TO YOU. YOU CAN READ MY FULL DISCLOSURE HERE)
Since I decided to do this Bunny Wall Decor craft on a whim all my supplies were found at home and at a local store. But don’t fear, as all these items are quite common so you can find them at just about any craft store or if you plan ahead you can order them on-line too.

First I took my base, which was a plain wood palette panel – like this one – and dry brushed it with white paint. I started with just a quarter sized dollop of paint on my paper plate. Then dab a little paint on your brush and slightly brush the plate, making sure that there isn’t too much paint on the brush. Apply the paint in long strokes onto your base and repeat. I like using these chippy brushes, they are cheap and a little imperfect giving you that weathered look on the base. Repeat until you are happy with the end results.

My end results were subtle…
I wanted it to look like a slight dusting of snow and not a blizzard hit the board…
Some winter humor for you…
Here is a side by side.

Next we want to get our Bunny figure on the board.
If you have a fancy cutting machine and can make your own stencil, Great.
If you are really talented and can free hand the Bunny, Great.
I have, nor am I either of those, so this is what I did.
First go to the internet and search for bunny outline in the images. Print your desired image. Make sure that your image fills the page, unless you are working on a smaller board that is. Next take a pencil and trace your Bunny outline, make sure you get it good.
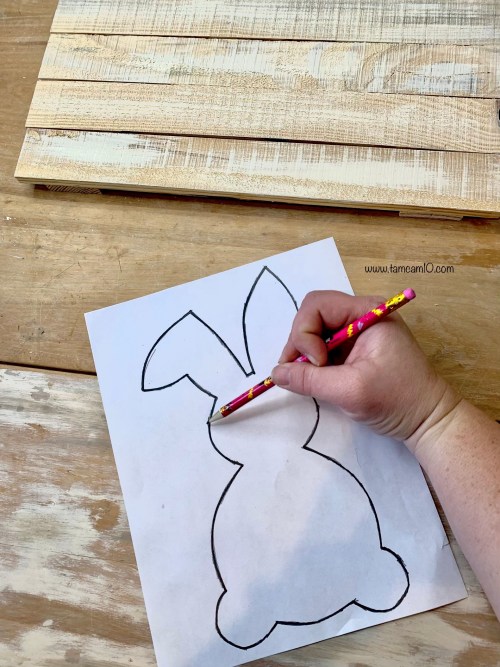
This part is optional, but I wanted my Bunny to be slightly bigger then the paper so I cut it apart. First cut down the middle of the top to bottom. Then cut side to side, I cut mine at the neck. Then flip your paper over, pencil side down, and start tracing the bunny outline with your pencil. The harder you push the better and if the pencil breaks through to the paper that is OK.

When you are finished you should have a faint pencil outline of our bunny. I then free handed and connect the missing parts with pencil before moving on to painting.
Oh yeah and I added on a little cotton tail.

Now to paint our Bunny outline. I just simply used some black paint, a small brush and painted over my pencil marks. Remember this doesn’t have to be perfect and imperfections add character.
Now comes the fun part.. adding the flowers. For this project I made some simple felt flowers, the hardest part was choosing my colors. Start by cutting a circle out of your felt, doesn’t have to be perfect, mine were about 3-4in in size. Then cut a spiral into your circle, see middle piece below. Last, starting from the inside wrap the felt around, creating your flower.

Play around with the size of your circles, how tight/loose you wrap them and see what different shapes you can make. When I had my desired shape I placed some hot glue at the tail end and on the bottom to keep the flowers together. Some flowers required a little more glue then others.
Then place the flowers around the top of your Bunny’s head, switching them up until you are happy with the placement and glue them in place.
And Voila you have your Bunny Wall Decor!

Cute, simple and a nice addition to your home decor.
Bet you can’t wait to see what I come up with next ; )
Love Always … Tam

